Your First Mailchimp html email campaign
After logging in you will arrive at your dash board
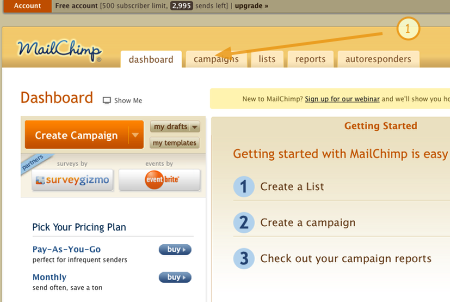
(1) If we have set up your account and added your current mailing list and set up your first template, jump staright to campaigns by clicking on the campaign tab.
If you are handling your own account then you will need to create a list first by following the 1-3 getting started wizard
Designing your campaign email
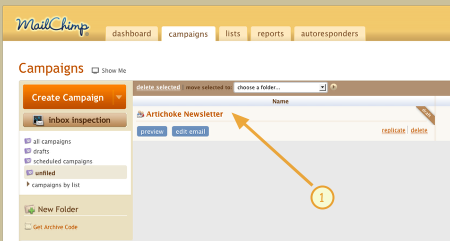
After clicking on the campaign tab you will see a menu listing your current campaigns
(1) Click on the campaign to begin work on the email
Who the email will be going to – recipients step 1 of 5
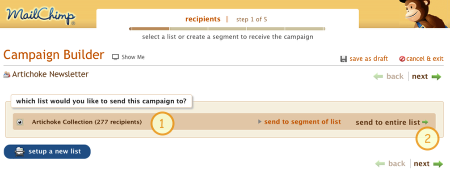
This first step allows you to choose the list of people that the email will be sent to. At this point you probably only have the one list, but as your campaigns grow you will be able to add more lists to target mailshots to different groups.
After you have selected your list (1) click on next (2)
Campaign preferences step 2 of 5

This will have been prefilled by us, otherwise fill out all the fields with your email information or change any of the details to your prefered options.
Create Email step 3 of 5
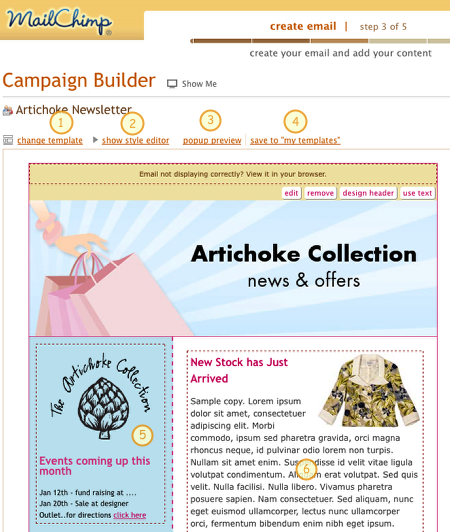
The template we have designed will now appear, but you can change this to any other by clicking change template. (1)
(2) The style editor will allow you change the colours and font styles of the template
(3) Will open a preview of how the email will look.
(4) Allows you to save your changes to the template or save as a new template
(5) & (6) By clicking in these areas the body of the email template will become editable.
Email content creation
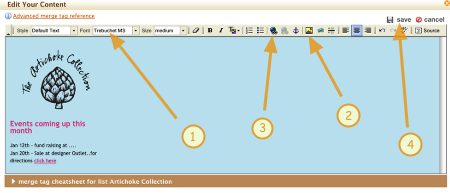
Once you are in editing mode for the body of the email you will be able to
(1) add new text and style it
(2) upload images
(3) make links to your website
(4) save your changes
Plain Text step 4 of 5
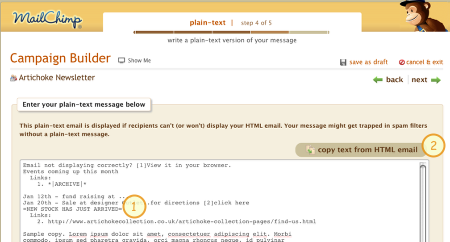
Some people are unable or unwilling to receive html emails soits a good idea to add a plain text version, this will also help to to get through many spam filters.
(1) You can just type in a simple plain text message or click the auto copy text from html button (2)
Confirm step 5 of 5
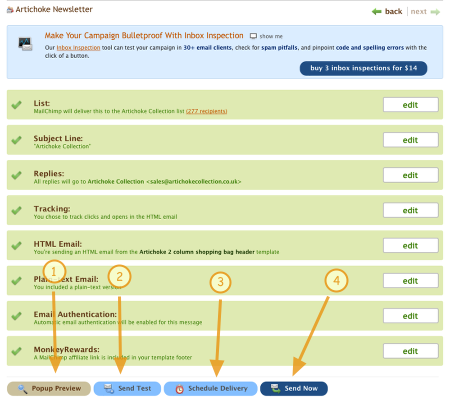
You should now have a check list all ticked. At this point you can
(1) A last preview to check your email
(2) Send a test email to yourself
(3) Schedule a date and time for your emails to be sent
(4) Send Now!