Adding Images using JCE version 1.57+
Step 1
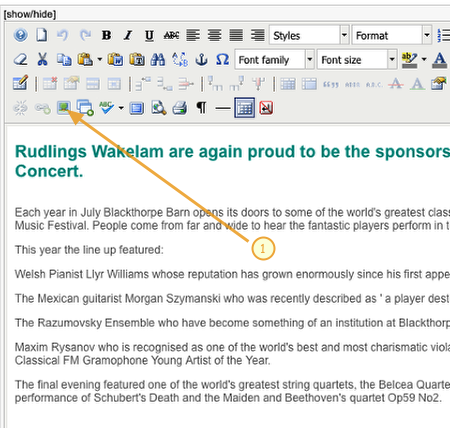
With your article open click on the Image insert/edit button.
The media manager will open.
Step 2
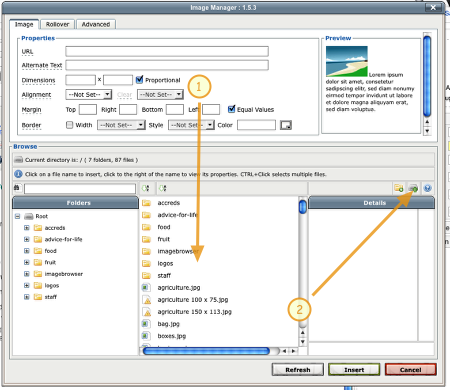
1) If your image has already been uploaded you will see it here in the file manager (skip to Step 4)
2) If you need to upload an image to the site click the upload button here
Step 3
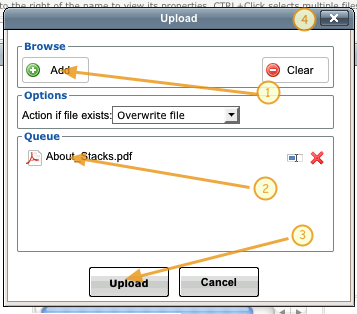
1) Click the Add button – you will now be able to select the file from your own computer
2) You will see the file appear in the queue window – repeat step 1 for adding more documents
3) Click the Upload button – this will load the documents from your computer to the website file manager.
4) Close this window
Step 4
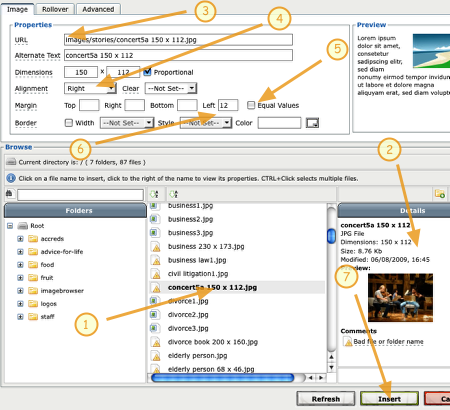
1) click on the image you wish to insert in to the article
2) details and preview of the image will appear here
3) check the image location is showing in the URL box
4) choose how you wish your image to align ie. left or right of the text
5) uncheck equal values box
6) add any white space you want around the image eg. 12 px on the left to hold the text away from the image.
7) click insert
Step 5
1) My picture is not quite in the right place.
2) I want this line to be to the left of the image not above it.
3) Click on the image to bring up the selection box with the white square handles – now click and drag the image until you see the cusor blinking to the left of the text in the row above – then release.