Backing up your CMS (Joomla or WordPress) website
It is vital to keep a regular backup of your website files and databases. It may be that your database corrupts or someone make a error in deleting or in putting data, or worse still you suffer a Malicious attack on your website. You may simply want to move your website. With a copy of your files and database any of these issues can be solved in seconds. If you don’t have this back up just think of all the hours you have spent inputting all the data on your website and then think about having to do it all over again!!

STEP 2
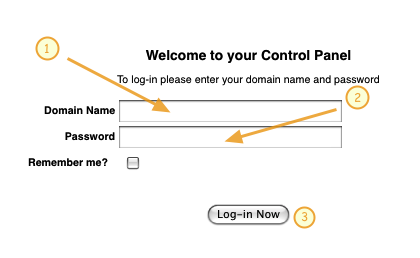
A new window will open showing the login for you control panel.
1 Type in your own domain name ie. mywebsite.co.uk
2 Type in the password you were sent with your welcome email
3 Click the “Log-in Now” button
STEP 3
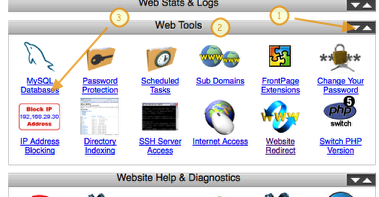
Look for the bar with the title Web Tools
1 Clicking on these arrows will open and close the panels
2 The Web Tools panel is open showing all the Web Tools
3 Click on MySQL Databases
Step 4
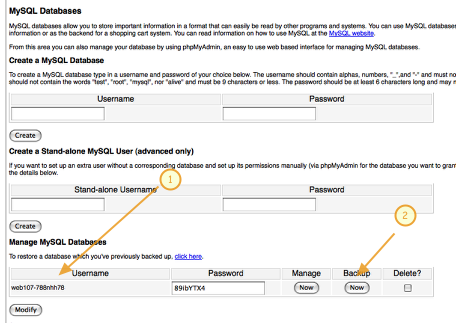
1 You will find the databases you are using listed here
2 Click here and your database will be download to your computer for you to safely store
NB. You may have more than 1 database if you a running a blog or special addon for image management – please make sure you have backed up all the databases.
Step 5
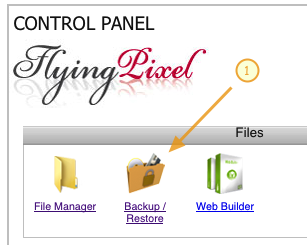
It’s also important to back up your website files and not just the databases, so that you have a complete copy of all your images and custom extensions and components that have been added to your Joomla installation.
1 Within your control panel under the Files section you will find a Backup module – click on this
Step 6
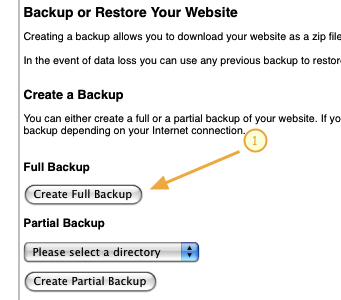
1 Click create full backup
Step 7

A zipped backup file will be prepared, this may take a few minutes depending on the size of your site.
The next window will automatically appear
Step 8
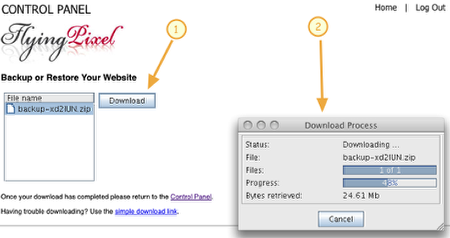
1 Click on the download button and select the destination you would like the file saved to on your computer
2 This progress window will open automatically and your file will be saved to your computer
You now have all your website assets safely stored on your local machine.