Add a New Product to WooCommerce for Wordpress
Log in to Wordpress
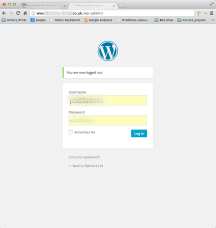
go to domain name and add "wp-admin" with a forward slash before and after at the end of the URL ie: " /wp-admin/ " and hit enter
- This will bring you to the Wordpress admin login
- Enter your Username and Password
Dashboard
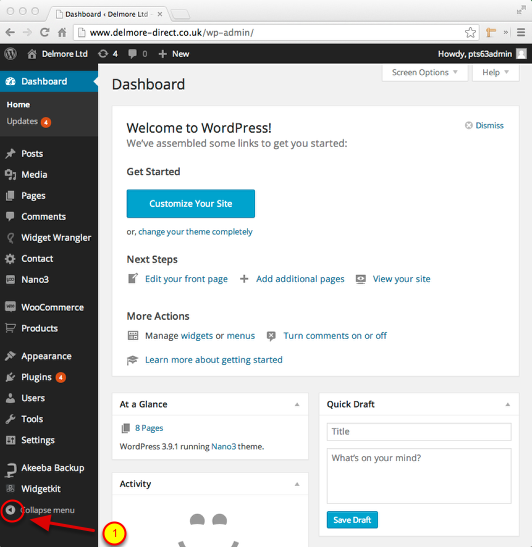
This screen is the Dashboard or the main control panel
If there are only Icons showing in the left menu click
- The Expand / Collapse Menu button - to Show or hide the menu
Checklist Before Adding a New Product
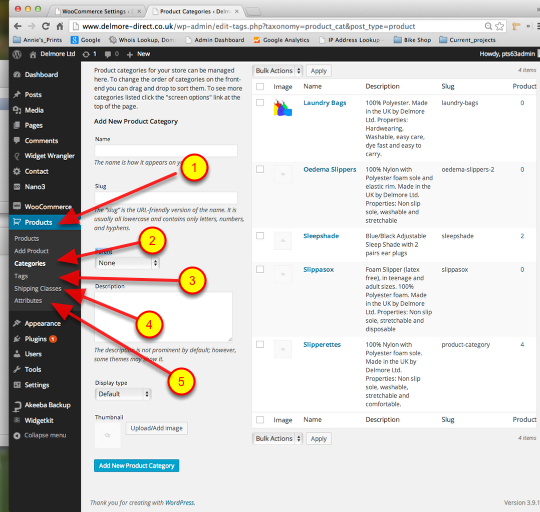
- Select the Products Menu item
- Check the Category List to make sure there is a Category for the New Product to be assigned to - if you need Help adding a New Category go back to the Lesson index a look at the Adding a Product Category in WooCommerce
- Tags - or Metatags as some people call them. The main purpose of Tagging items is to help the Google search engine when indexing the site, they are also another way of organising or grouping prouducts. Open the Product Tags page and add as many possible words or phases ( eg: Laundry Bags ) that are applicable to your products.. ( in this example I've added : - Laundry Bags, Washing Bag, Delmore, NHS )
- If you are offering Shipping you will need to Check there is a Shipping Class setup for the New Product - if you need Help adding a New Category go back to the Lesson index a look at the Adding a Shipping Class in WooCommerce
- Attributes : If you are going to offer your Product in different, Colours, Sizes or Quantities you will need to set these up as Attributes - if you are adding multiple products with the same types of Attributes you only need to set this up once, you'll use the same Attributes on each Product and ammend the Prices seperately
Tax - If you need to charge Tax, you will need to enter your Tax Rate - Goto - WooCommerce in the main menu > Settings - in the sub-menu > Tax - Tab at the top of the page - Check "Enable Taxes" configure the page as you would like the site to display - Scroll to the bottom of the page to "Save Changes" - Next the Tax Options at the top of the page is "Standard Rates" enter your standard tax rate
Once you've checked all these you are ready to Add you Product
Adding a New Product
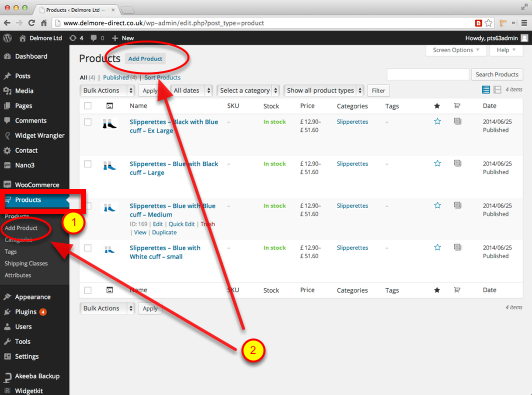
Click the
- Products menu item to select the product list
- to Add a New product - click either one of the 'Add Product' buttons
Enter Product Details
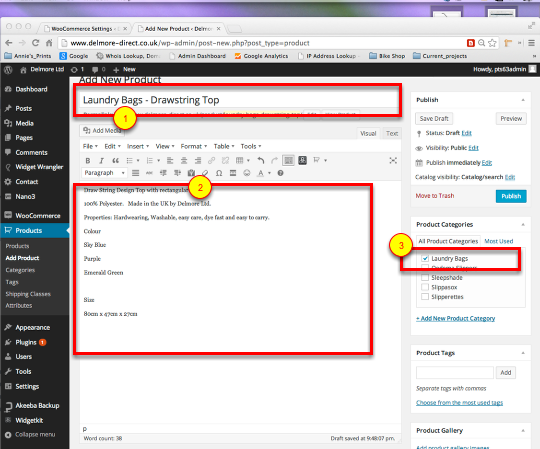
- Enter Product Name
- Full Product Description
- Select Product Category - If you missed the Adding Product Category in the Check list, there is a shortcut - Click on the " + Add New Product Category " just below the Category list
Adding Tags and Product images

- Tags - are not required, but will help with organising and displaying your products
- Will be displayed as a series of small thumbnails below the main image on the Product detail page
- Product image is the main image to be used with your Product
Product Data - Simple Product
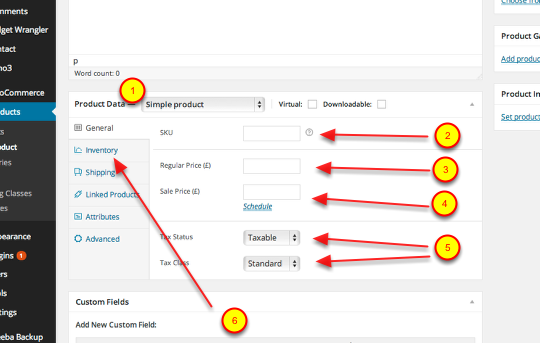
- If you are entering a Simple Product - ( Default ) leave this dropdown as is and enter an
- SKU - ( Stock Keeping Unit ) and unique reference identifier, number, name or code.. this is "Not Required", but is a good practice and will ease future tracking, searching and editing processes.
- Regular Price - is the including tax ( if taxable )
- Sale Price - use this if you want to have a Special Price and click the "Schedule" below to add start and finish dates for the Special pricing to run
- Tax Status - Under the WooCommerce > Settings > Tax - if Tax is enabled, you will need to setup your Standard Tax Rates before you started
- If you are using the Inventory feature in WooCommerce, select this tab and enter your current inventory into the appropriate field
Product Data - Variable Product
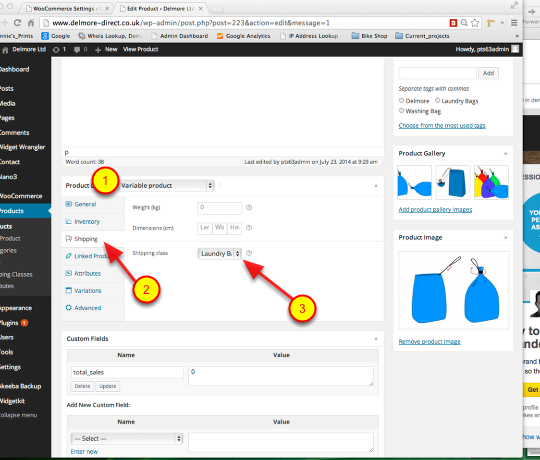
- Select Variable Product if your products have Variable attributes
- Select the Shipping tab
- Select - Shipping Class from the dropdown list
Add Attributes

- Select the "Attributes" tab
- From the Dropdown, select the Attribute to be added
- Hit "Add"
Select the Attributes to be added for this item
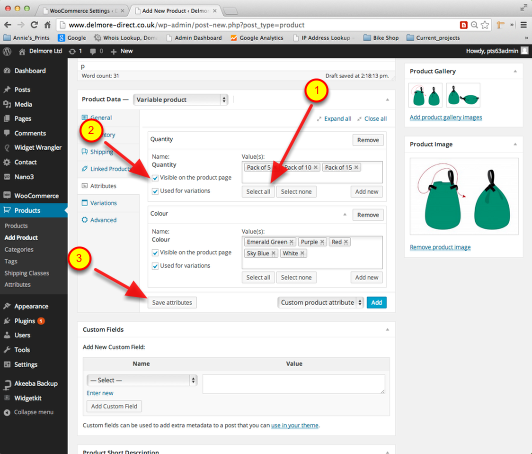
- Once the Attribute type has been added, you will you will need to select which Attributes apply to this particular Product - In this example I have attributes setup for "Pack of 5", "Pack of 10, 15, 20. This product is not available in "Packs of 20" , so I have used the "Select all" button, then used the " x " to remove the "Pack of 20" from this product. With the "Colour" attribute type I have added all the available colours.
- Check the Visible on page, and used for Variations to add these Attributes to the selling page
- Select the "Save attribute" button when all the attributes have been saved
Add the Variations ( Variable Pricing ) for the Attributes
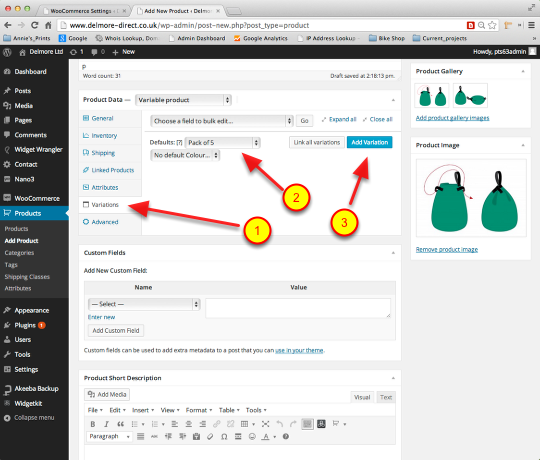
- Select the "Variations" tab
- From the Dropdown list select the first "Attribute" that you would like to add the Variables to
- Hit "Add Variation"
Add the Variations ( Variable Pricing ) for the Attributes
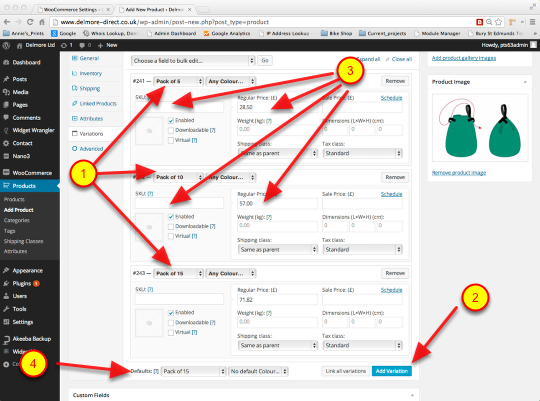
- After you've added a new Variation, select the Dropdown to choose the Attribute that you are adding the variation to
- Use the "Add Variation" button to add more Variations to your Product
- Enter an SKU for each item ( this is not a required step, but is a good idea ) - the "Regular Price" field is a "Required" field, so add the Price here. If you are charging "Shipping by Weight" enter the weight of the Product Variant or if you are useing a different Shipping Class, use the Dropdown to select the correct Class
- Defaults : this will be the Default Variation that appears on the main Product page, if you would like none of the Variants to be displayed as the Default, select " No Default Quantity" from the dropdown
Finally add a "Product Short Description"
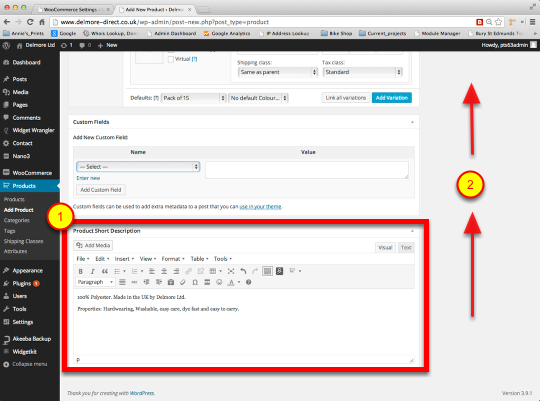
- Add a Short Description for your Product
- Finally, Scroll back up the page a Select the "Publish" button. Once the page has been published this button will read "Update"
Friday, 25 July 2014