Adding an image to Wordpress - Posts or Pages
Images need to be uploaded, stored and inserted to be displayed as part of the site content
*** Important Note *** Files need to be of a suitable size for use on the website ** The overall width of the site is 1000 pixels ** Therefore most images will only need to be 300 - 400 pixels wide *** Most modern cameras ( 2015 ) or even mobile phones have standard resolution of 3000 - 5000 pixels wide.. Use Microsoft Windows Paint or Mac Preview to reduce image dimensions to a sensible size before uploading.
There are 2 different methods for adding an image to a Wordpress Page or Post
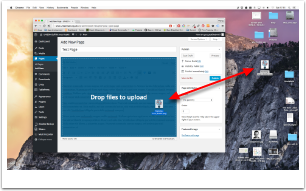
Method 1. - Drag and Drop
Place your cursor within the editor area where you would like to add your image
Drag and Drop the image from your computer (Mac - Finder ~ Windows - Explorer ) into the page area - Once you have Dragged an image over the area, you will see a blue overlay indicating "Drop files to upload"
Uploading
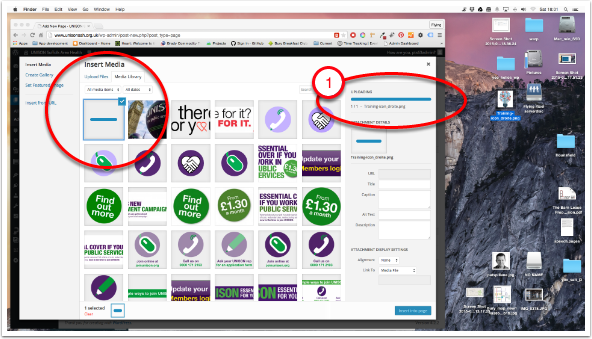
Once you've Dropped your into the 'Target' area, the Media Library window will appear with a
1. progress bar showing upload progress
Set - Media Link and image display size
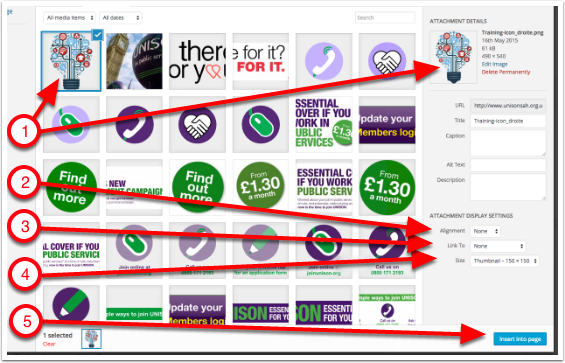
The new image will be showing in the Library with
1. Highlighted blue border around the preview with a 'Tick' in the top right corner - and - File 'Attachment Details' showing the actual image dimensions, date the file was created and physical file size ( in Kilobytes )
2. Alignment - Please set to 'None' - we will cover the aligment in the next step
3. 'Link to' setting should be set to none - unless you would like the image linking to a different URL or part of the website
4. Set the size you would like the image to display on the site - Wordpress creates smaller versions of large images during the upload process, these size options will be visible in the Dropdown list and show the dimensions of the different versions ( In this example ): Thumbnail = 150 x 150 pixels, Medium = 272 x 300 pixels and Full size = 490 x 540 pixels
5. Finally - Click the 'Insert into page' button ( bottom right )
Set image alignment
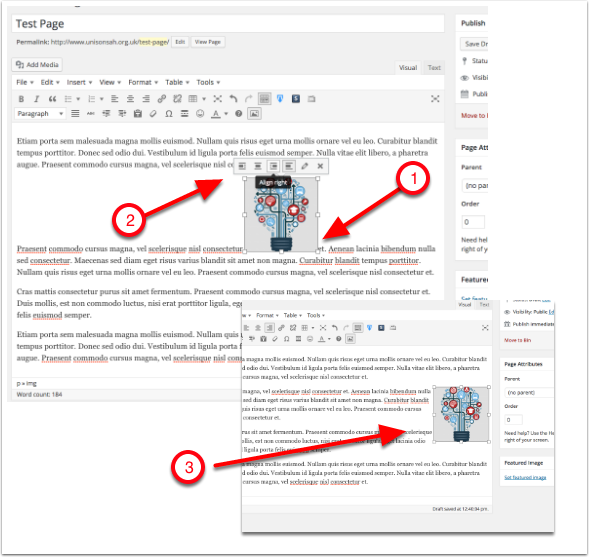
By Selecting the image on the page -
1. When an image is added to a Wordpress page with it is effectively inserted into the text string ( just like a text character is added to a sentence as shown in the sample below )
2. The 'Alignment' options will appear above the image - **Note** The option thumbnail icons show a preview of the image position with text wrapping around the image
Setting - Text 'Padding' ( space around the image )
1. To set the Padding around an image, First make sure the image is selcted, the corner size adjustment handles are visible when an image is selected ready for editing
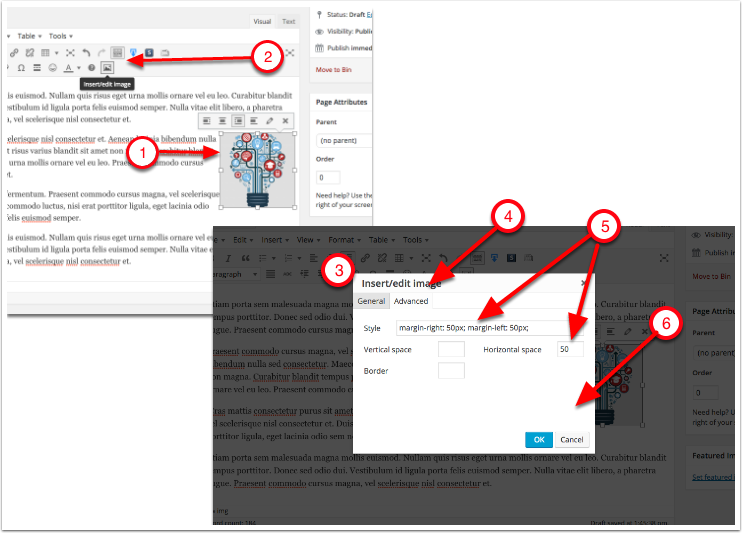
2. Select the 'Insert/edit image' button from the toolbar
3. Inser/edit image 'Pop-up' control panel
4. Select the 'Advanced' tab
5. insert the number of pixels required for padding or margin around the image, when you 'Tab' out of the field you will see the code appear in the 'Style' ( in this example I've added 50 pixels in the 'Horizontal space', which is then reflected in the code in the 'Style' panel
6. Select 'OK' to add the padding to the image
Check your image 'Padding'
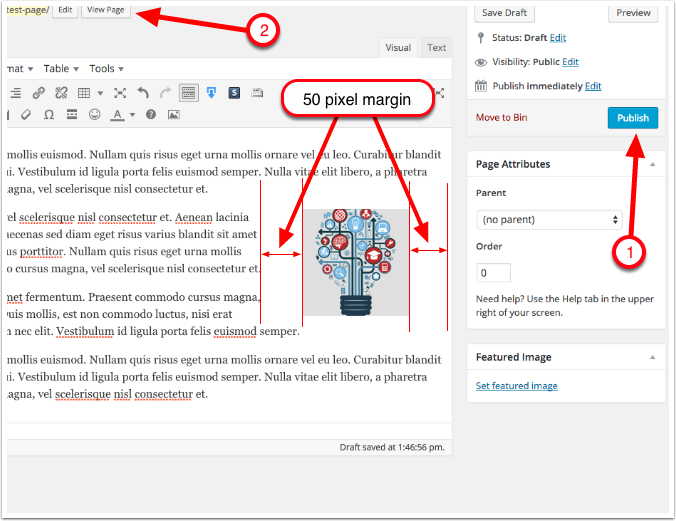
This example displays a margin of 50 pixels horizontal space around the image
1. Click the - 'Publish' or 'Update' button to save changes
2. To check on the Fornt-end of the website click on the 'View Page' tab